MASSIVE Manicure Set Give Away!

Manicure Set Giveaway

Why hello there all you lovely people! 🙂 So, as the title might suggest to you, this is a giveaway!  My birthday is coming up (It’s March 5th), so I figured what better way to celebrate than to give gifts?  Share the love, I always say. ^-^  So, that’s where you guys come in – I am giving away 3 huge manicure sets of my own design, one on WordPress, one on Twitter, and one on YouTube.  Each set has more than 20 items in it, and they are all of the supplies you need to do a full manicure (in my opinion).  I used only the supplies I’m giving away to do the following nail designs :

0205141616a 0205141616

And I’m sure you can do tones more – these are just the ones I came up with after an hour of riding the subway ^^;;  As always, if you want tutorials on any of the designs, all you have to do is ask!  Just tell me what side of the post (right or left) and which finger Pinky, Ring, Middle, Index, or Thumb) And, in case you want to know in detail what you’ll be getting, here is the Full List:

– 1 striped travel bag
– 1 travel tube of Crabtree & Evelyn Handcream
– 1 pair nail clippers
– 1 Glass Nail File and travel case
– 1 bottle Mavala Scientifique
– 1 bottle nail strengthening base coat
– 1 Travel sized polish, “White on White” by China Glaze
– 1 Full sized China Glaze Nail Polish
– 1 “Ink” pot by China Glaze
– 1 bottle Matte Magic by China Glaze
– 1 travel sized bottle of Seche Vite
– 1 travel sized bottle Tammy Taylor fast dry cuticle oil
– 5 Orange Sticks
– 1 Wheel of Nail Art Gems
– 1 Glass Acetone Cup
– 1 4oz bottle Pure Acetone
– 1 square nail art brush

So, whether you’re here from YouTube, Twitter, or follow my blog regularly, let me tell you how to win!

The Coral “YouTube” Bag:
– Subscribe to my YouTube Channel
– Like the Giveaway Video
– Leave a Comment about your most essential nail item or what item you are most excited to try from the giveaway goodie bags.

The Blue “Twitter” Bag:
– Follow me @RaeynnBeau”
– Use the Hashtag #ManicureBag
– Tweet your most essential nail item or what item you are most excited to try from the giveaway goodie bags.

The Navy “Word Press” Bag:
– Follow my Blog
– Like this Giveaway Post
– Leave a Comment about your most essential nail item or what item you are most excited to try from the giveaway goodie bags.

Contest is open worldwide, and you have until March 4th, 2014 at 11:59pm Eastern Standard Time (EST) to enter.  I’ll post a video with the winners listed on my birthday (March 5th) and send out the goodie bags!

May the Odds be Ever— — I mean good luck! :3

Until next time, may your life be full of color!
❤ RaeynnBeau

(And, in case you wanted to see it, here is the YouTube video!)

http://youtu.be/BxlRMNdmQ20

Polar Bear Nails!

So … guess what I have for you?

1219132205aYou guessed it (or maybe you didn’t?) Polar Bear nails!  Which I keep trying to type as Panda Bear nails, though they are very similar so can you blame me …?   Anyway,  I just posted a tutorial on how to do this nail art on YouTube, but if you wanted to see more pictures, you’ve come to the right place.  Or, if you haven’t seen the video yet, you can check out the design and decide if you want to watch.  (It’s a really short video though, so it won’t take up too much of your time!)

Anyway, to the left you see the accent nail and part of the main nail design, but below I’ll show you a few more pictures before we get on with the list of the materials I used.

1219132200 1219132202 1219132203a

As for the thumbs, if you are wondering why they are missing dots and have weird little swirls on them, I was going to put something like snow drifts on them before I decided to just go with a row of dots – the thumbs were the first two I painted, and I decided I didn’t really like it as much as I would probably like something else … Wasn’t sure what at the time (rhinestone, etc) but I decided to try something else anyway.  I also considered using white flocking powder to make the bear faces fuzzy, but I wasn’t sure if I would be able to put the face on top of it without making a mess.  So yeah; if you try that out let me know what you find out, or if you know if you can paint over flocking powder, tell me – I would really like to know.

1219132208As for materials used, they are as follows:

– Alpine Snow by OPI
– #241 by NYC Nail Glossies
– I’ll Take the Cake by OPI
– Ski Slope Sweetie by OPI
– Fairy Dust by China Glaze
– #430 Black Satin by Rimmel
– Seche Vite

Like the video says, it’s been pretty cold in NYC this past week – the entire US has been cold honestly, and it’s pretty crazy.  Definitely a good time to stay bundled up and stay inside as much as you can.  Too bad it came in the middle of the work week, so avoiding outdoors wasn’t really possible, but … Hopefully you stayed pretty warm!

Until next time, I hope your life is full of color!

❤ RaeynnBeau

P.S. If you want to check out the video, all you have to do is click below and learn how to make these super cute nails!

Once Again, Nail Art

Alright; so I do a lot of nail art … I’ve already made a few posts about it, but I can’t help it – nails are one of my favorite things to do.  ^^;; I haven’t made tutorials for any of these designs … I was thinking of maybe making a video compilation of a bunch of my nail art designs and asking people to vote on which ones they want to see done.  I dunno; we’ll see – there is a whole lot hanging around because I hate boring nails … A plain color just seems so dull to me; I always need to spice it up even with just a few lines or something.

This post is basically an, “I was flipping through my photos in the phone and realized I had a lot of pictures of my nails that I haven’t posted yet” collection …

Anyway … here; have some nail candy 🙂

IMG_20130329_103237IMG_20120918_11185820131102_003243

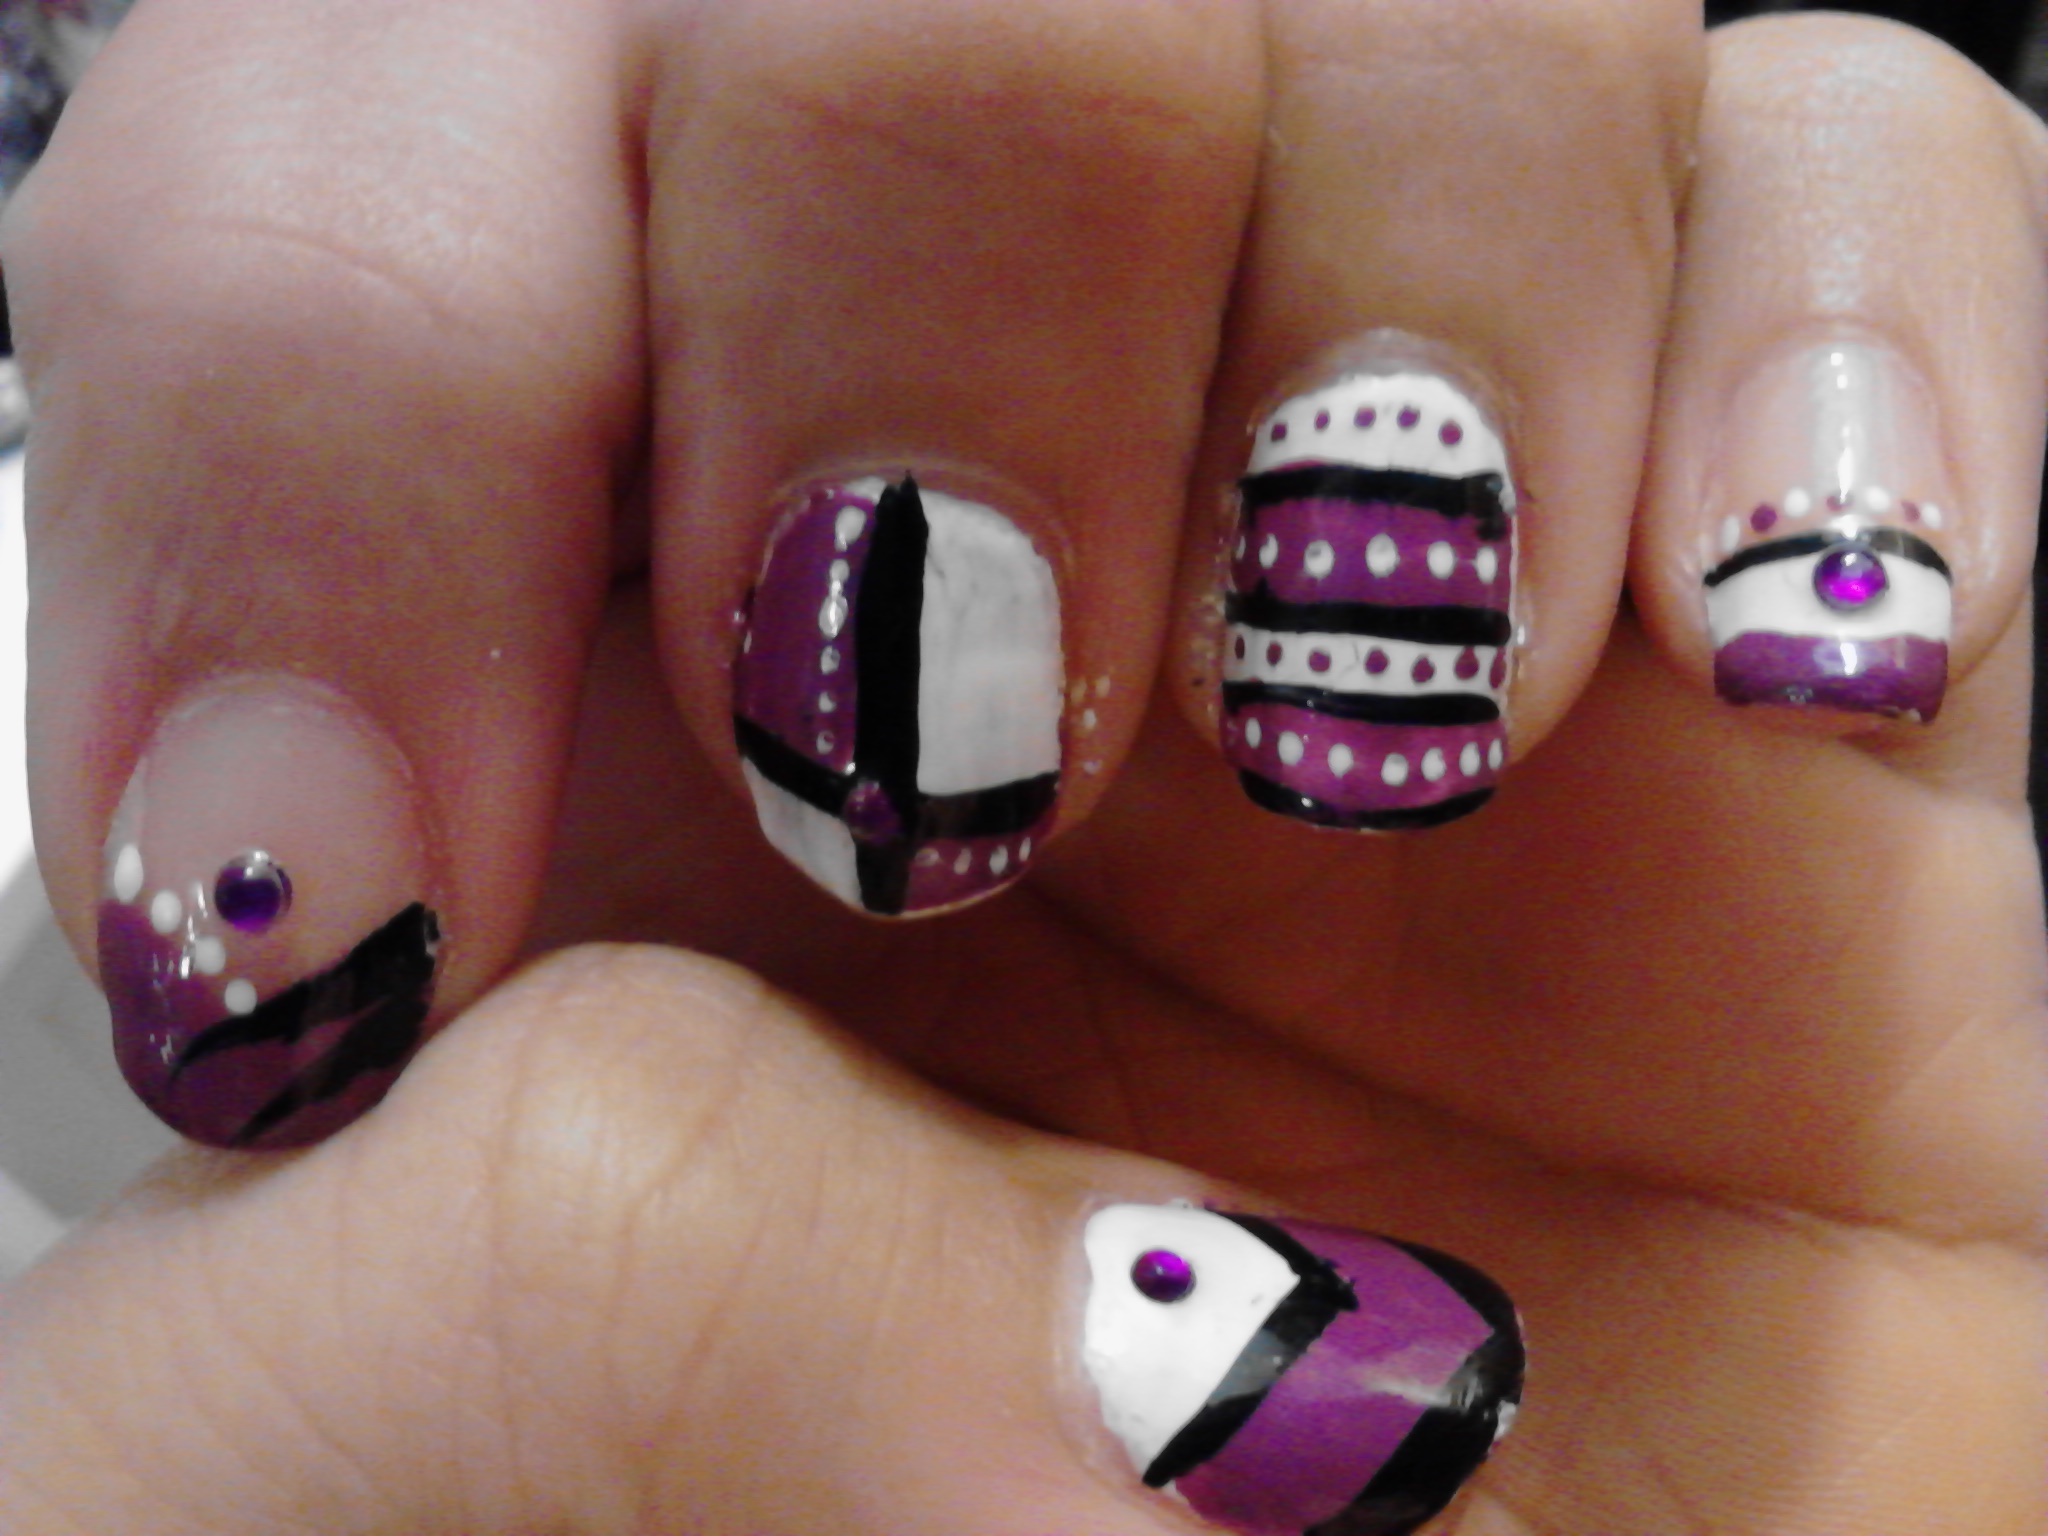
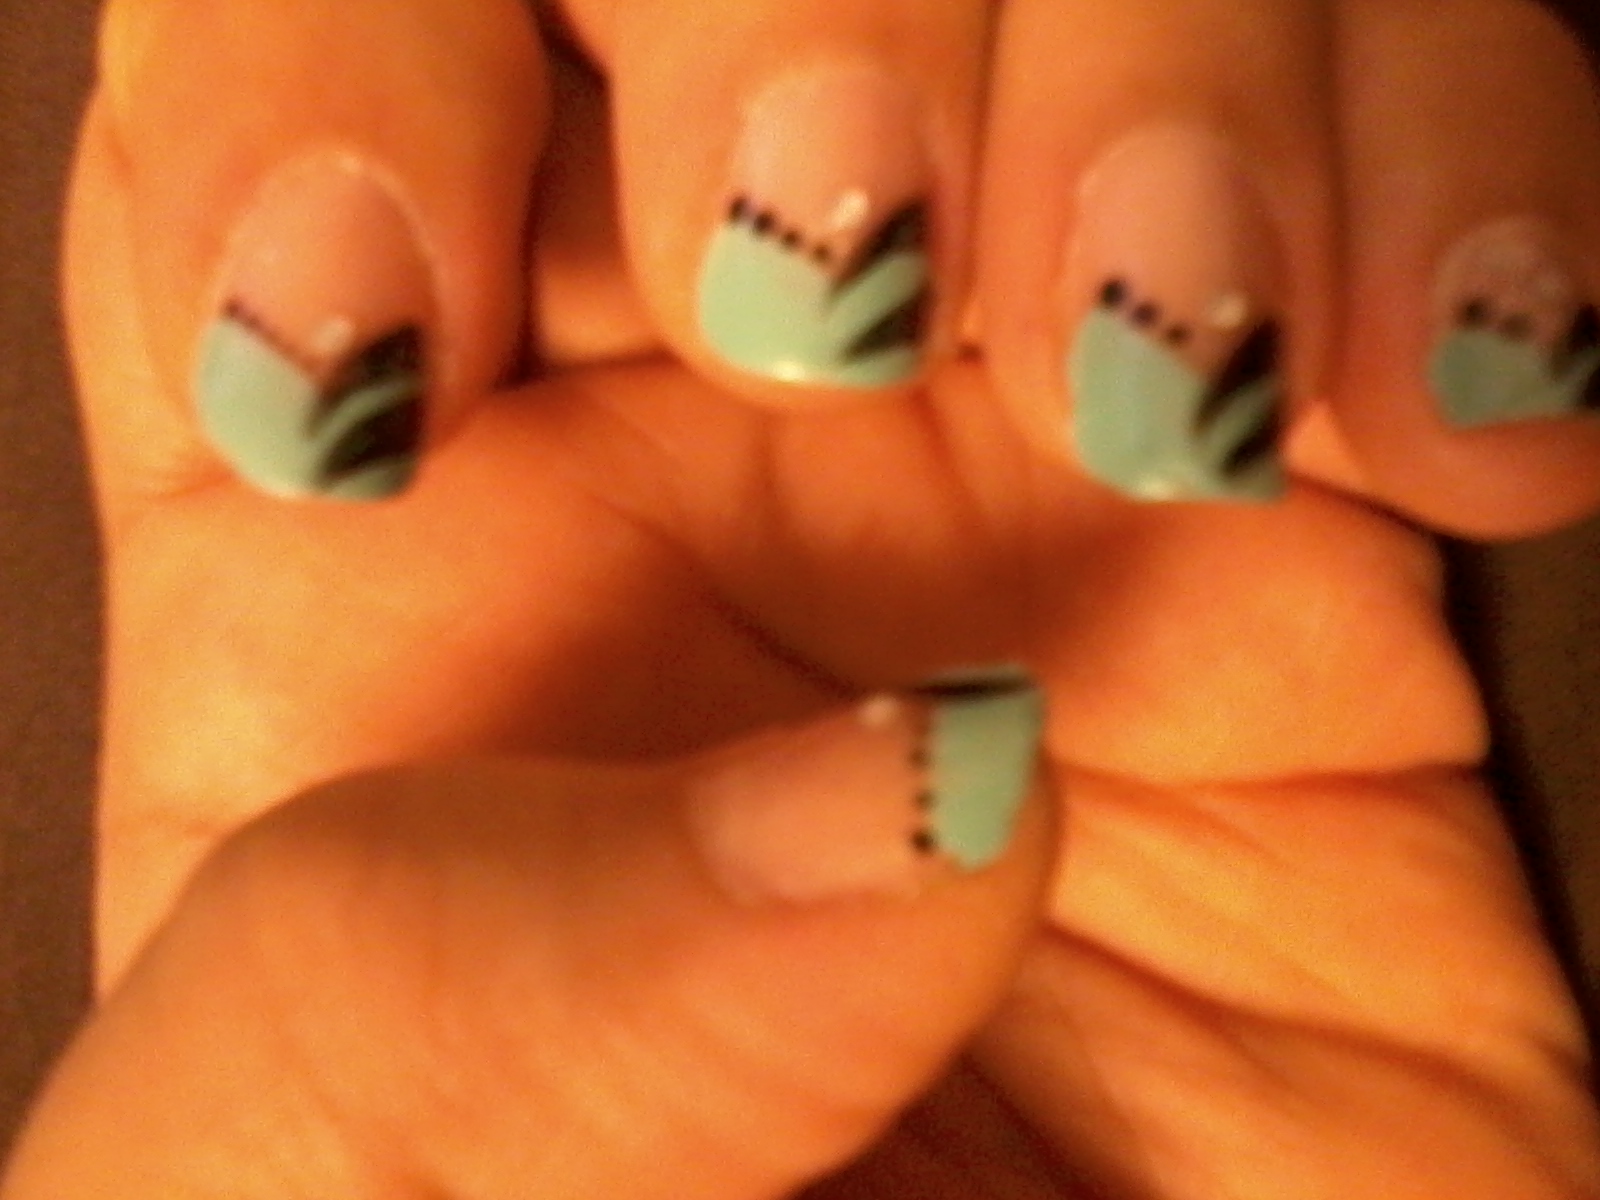
This is a variation on the same design in 3 different colors; the purple one is on a friend’s nails.  The red one was the first time I did it at all, so it’s the most plain.  The green one is jazzed up with a few flower shaped gems – which I believe was my St. Patrick’s Day style for 2013, actually – and the purple one has purple stars and glitter across the colored section.  Just an example of how you can really switch it up just changing the color and adding or taking away glitter/stones/dots … little tweaks can step it up a notch (or in some cases take it too far over the top, so watch out for that ^^;;).

1108130733IMG_20130128_092122

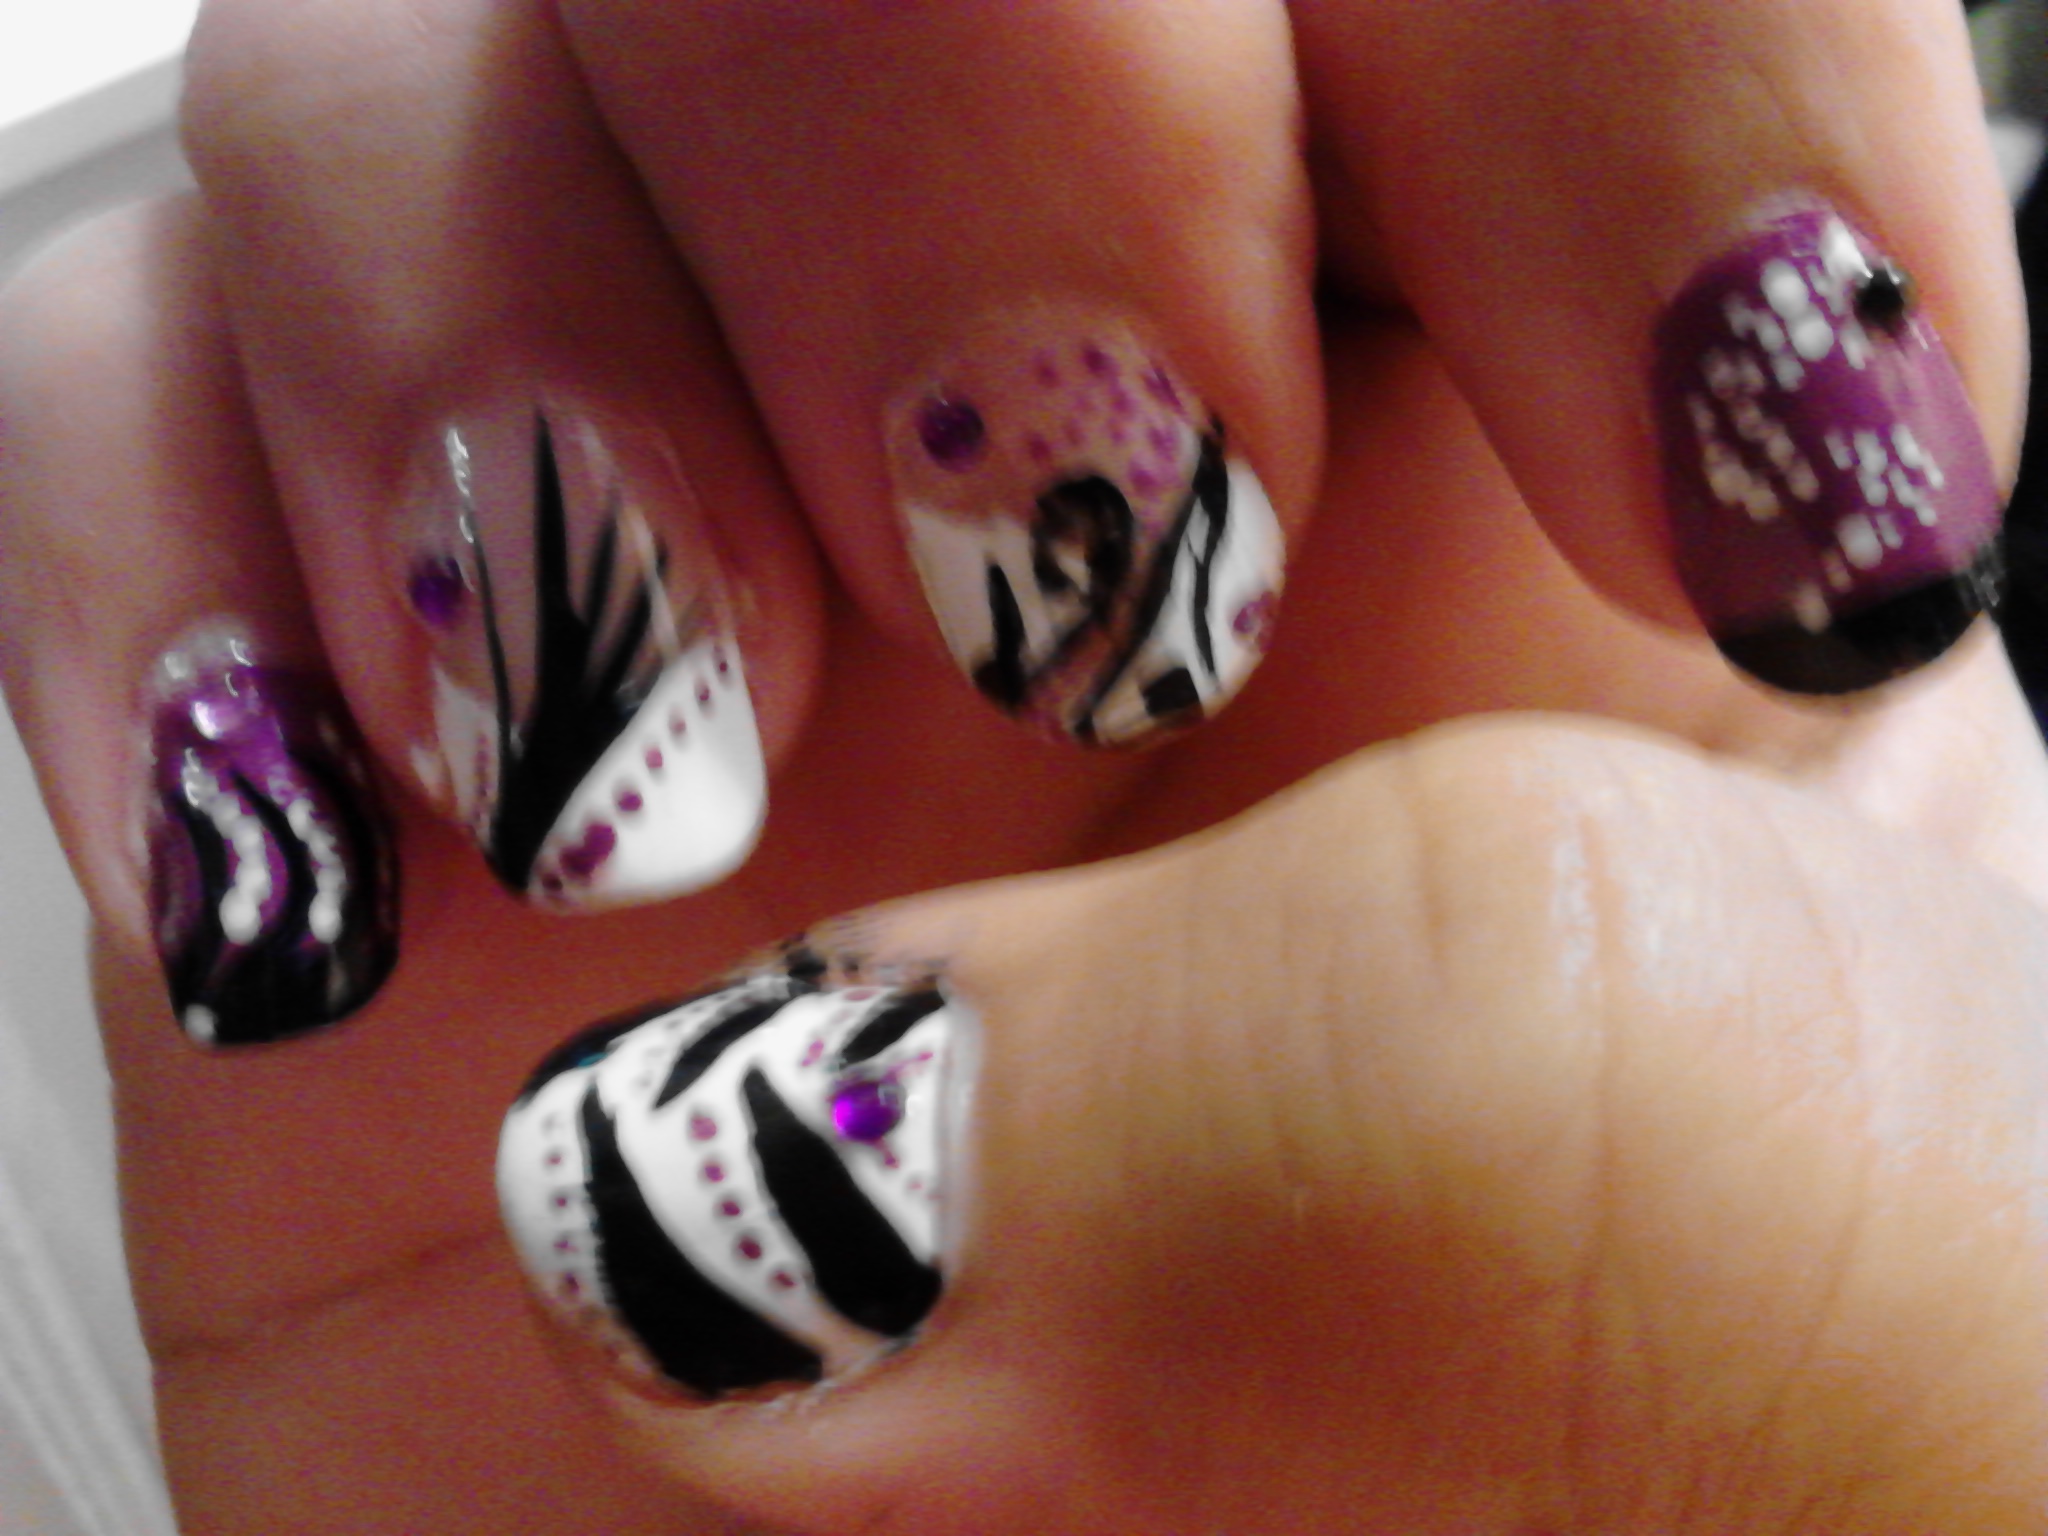
As for this design, the one on the left is a little messy – I did it on the train into the city when I was still commuting from the friend’s house I was staying at.  One morning I couldn’t sleep and I found my For Audrey by China Glaze and a black striper in my bag, so I went to town xD  The picture on the right is older, and is a slight variation on this one in so far as there are little rhinestones in the middle of the V-shaped French.  Otherwise they’re the same though, and I do love gems, so I prefer that version – but you can of course go either way!  Actually, I think I got this design from a YouTube video I watched a long time ago, but I can’t remember … 0104141721

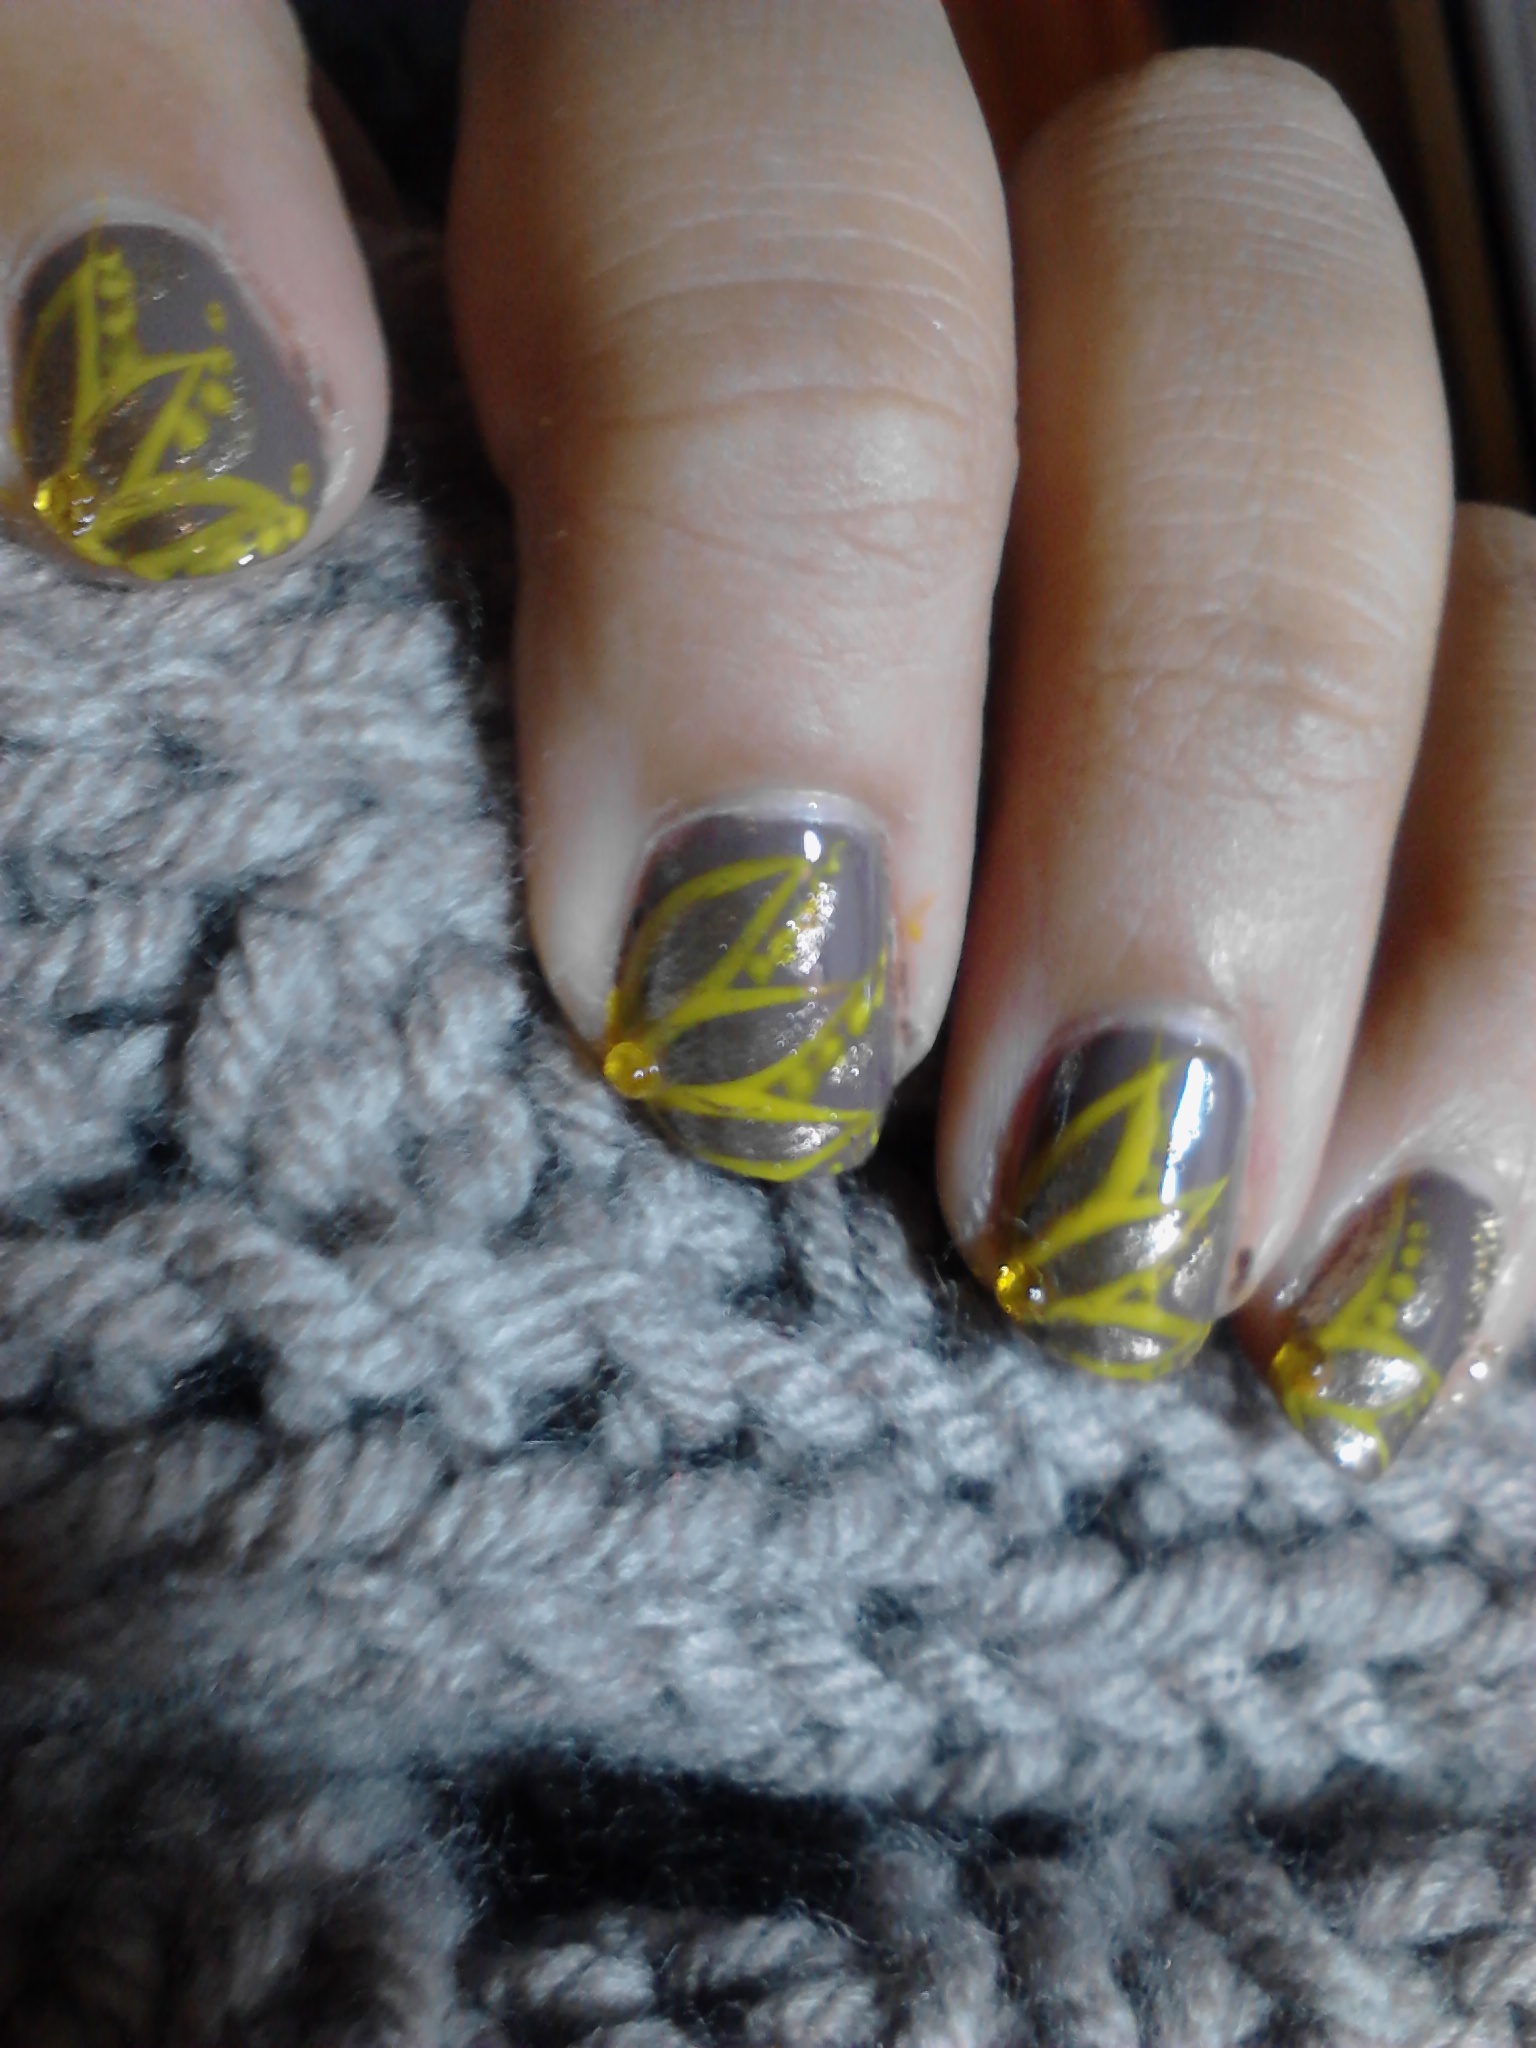
Next up we have a sort of more fall themed manicure; I actually just did this one recently because I received the warm gray/brown background color in my Ipsy glam bag for December 2013.  I was just going to paint them with that, because I liked the taupe-y color, but again … Too boring.  Can’t have that, now can we?  ^^;; So, I just grabbed a yellow striper and painted a few yellow leaves – honestly, they were supposed to look like flower petals, but that didn’t end up happening the way I wanted it to … And of course, I’m a total sucker for gems, so again we have a little bling in the corners.  Word to the wise though; expect them to fall off pretty quickly if you put them in that spot – they look nice for like, 2 days, and then as soon as you start doing anything, you lose them one right after the other.  It’s not very practical placement, but it looks nice, so … whatever.  ^^;;

IMG_20130415_083507And here’s a cute design; or at least, I thought it was cute.  Can you guess what it is …?  Probably the most inappropriate nails for a vegan to have ever … Bacon and Eggs!  I dunno I was in a weird mood and I decided that I needed breakfast food on my nails or something … So this design was born.

Sorry the picture’s so blurry; I was taking a picture of my right hand with my left hand holding the camera because I liked it better than the nails on my left hand.  Which is funny because usually my left hand comes out better (since I am left hand dominant) … But whatevs.  ^^;;

201311029520563620131102952121202013110295212313

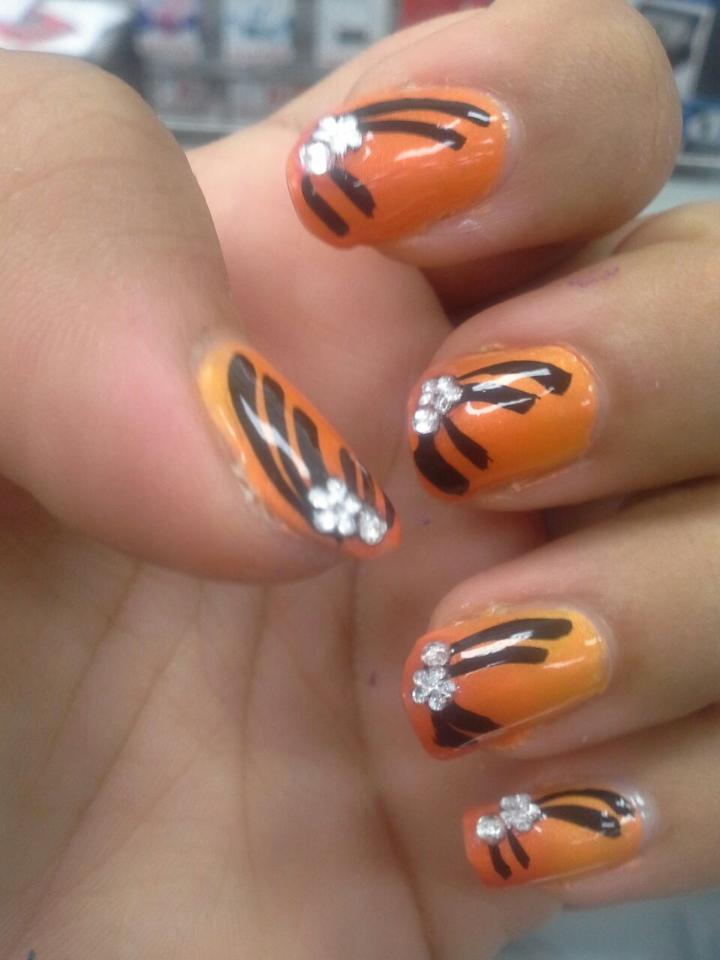
Here’s a fun one; of all of my color changing nail polish, my yellow/orange is my favorite … probably since orange is my favorite color.  But anyway – this is a really quick simple design I did mostly because I wanted to really showcase the color change … The middle is what it looks like normally, the right side is just after I doused my hand with cold water, and the left is just after I doused it with hot water.  Color change manicures are really fun; I have a purple to pink one and … I think a blue to green one as well?  Either way; these are def fun polishes to wear especially in like, spring or fall when your hands are warm but the air outside is cool.  It makes for the best transition effect on your nails. :3

0802131430
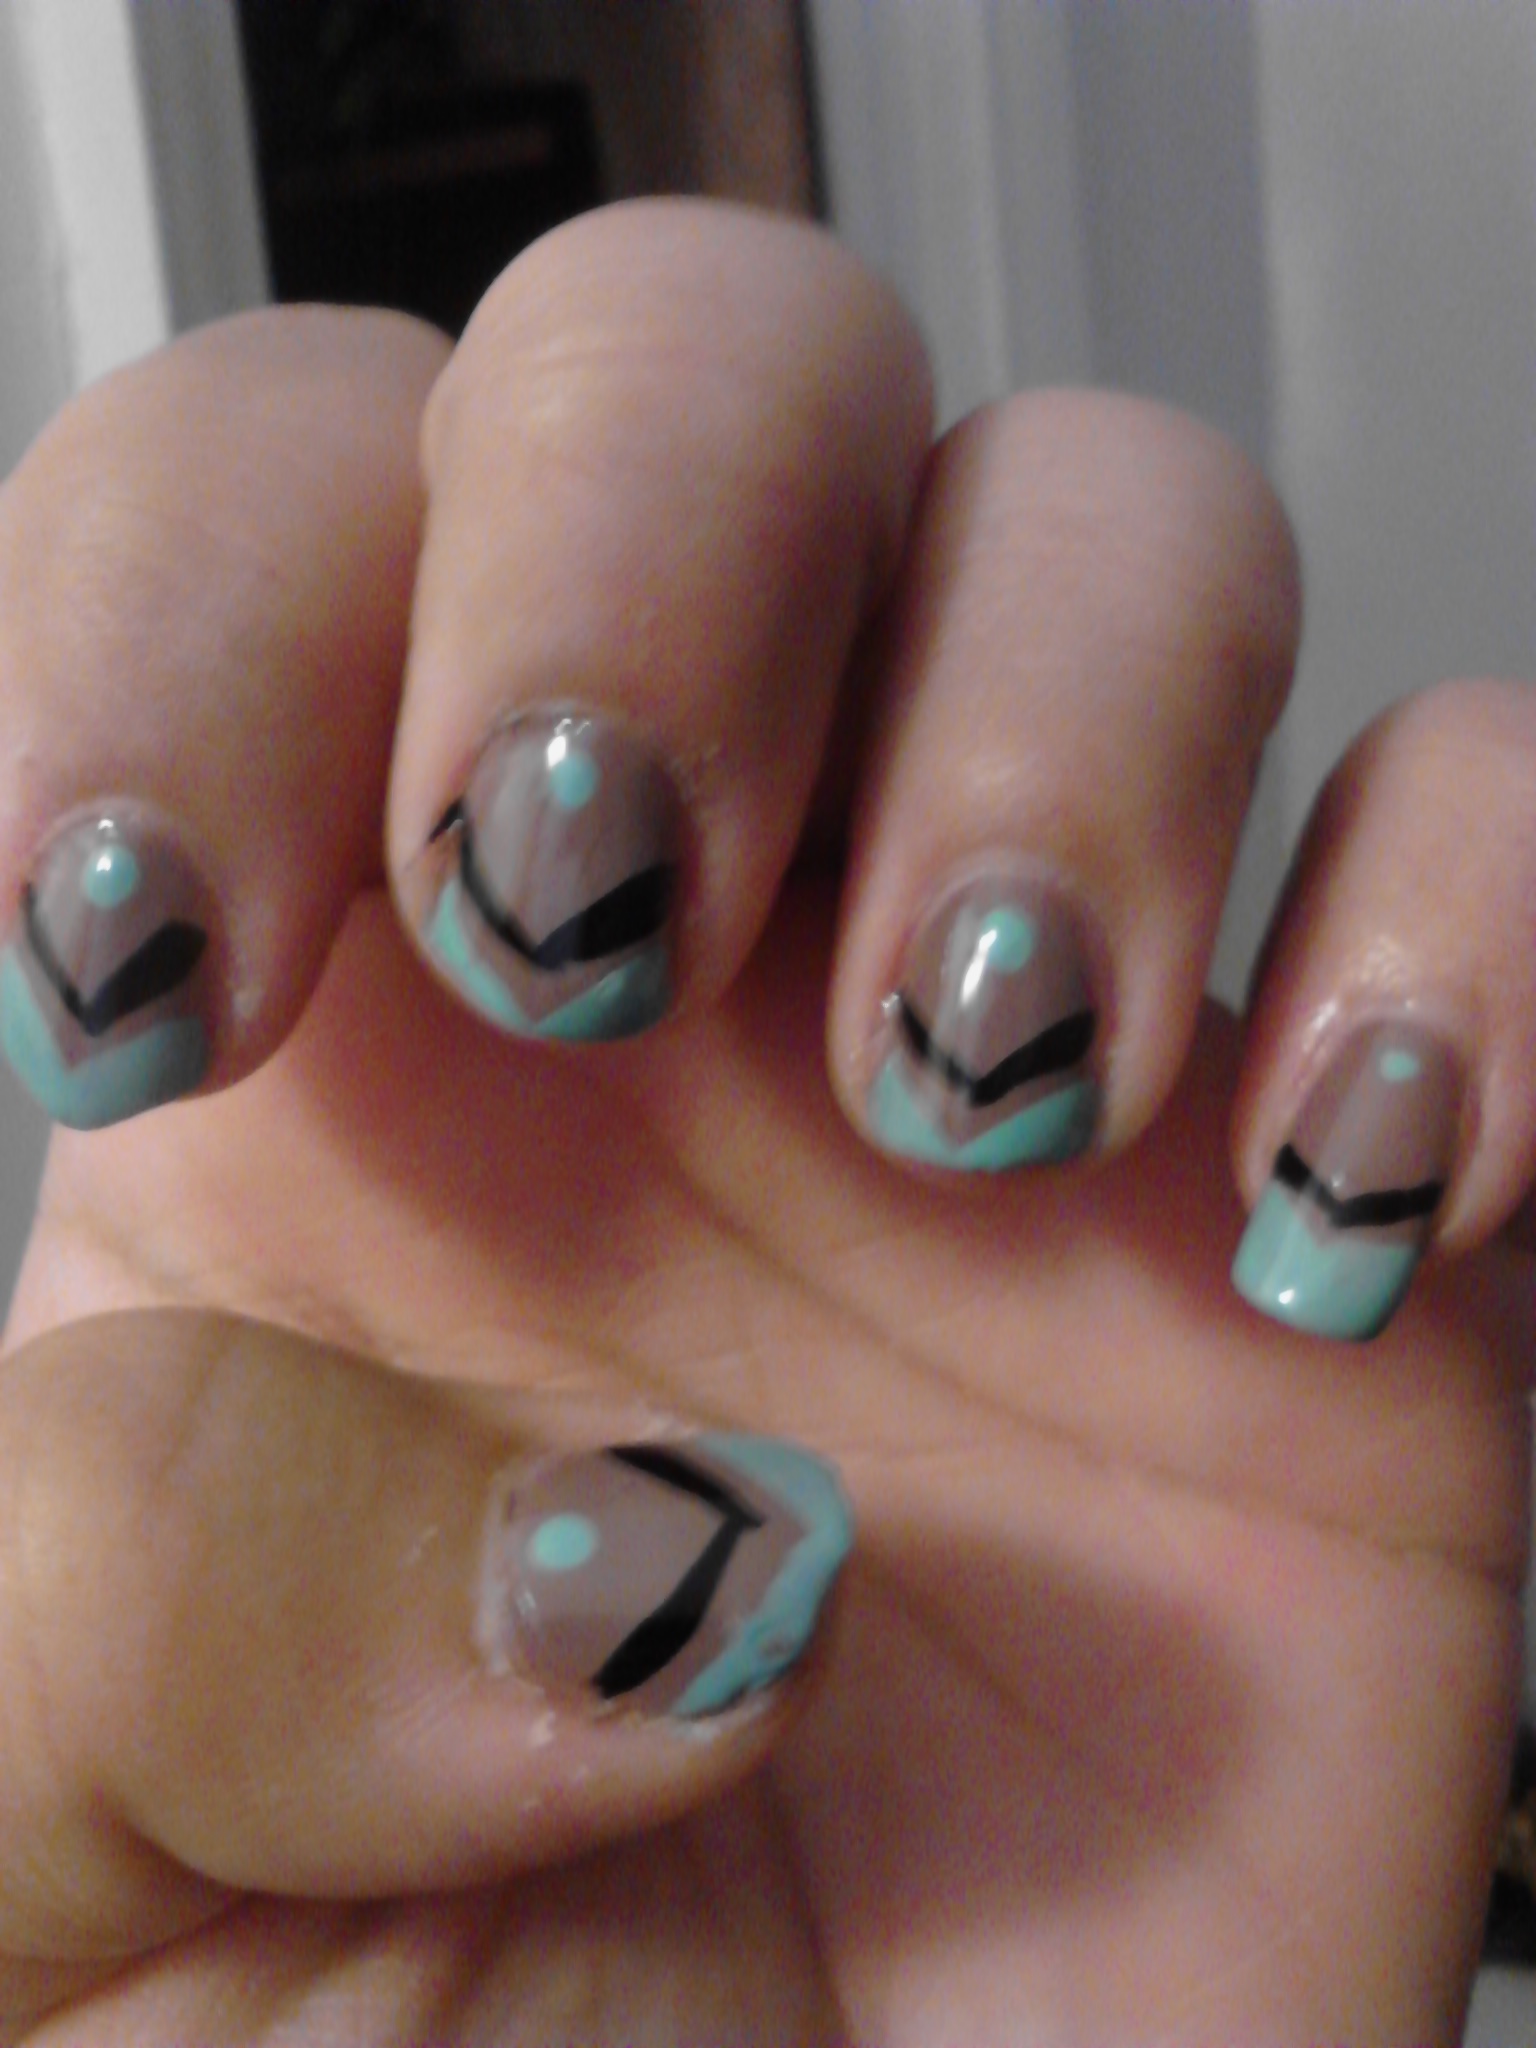
Here’s a fast Chevron I did when I was camping last summer – it doesn’t take any tools at all.  All I had with me were 3 polish colors … I believe they were OPI’s Skull and Glossbones as well as Mermaid’s Tears from the Pirates of the Caribbean collection, and OPI’s Kiss Me on My Tulips is the bright pink.  It was actually super easy; this manicure probably took … I want to say 15 minutes total.  And I don’t think it looks too bad for not having any tools or anything … Also painting it while laying in a sleeping bag because it was cold … xD

IMG_20130228_152742Here is a design that looks similar to the purple, green, and red ones from earlier in this post, but they’re a little bit different.  A lot simpler – and I guess more work appropriate if you work in an office that doesn’t allow you to be a free spirit … Well, but they’ll let you be a free spirit enough to have more than a solid color nail … Or will let you paint your nails at all, since I’ve worked places where that isn’t a thing.  Which always made me super sad… ^^;;

But anyway; this was just a sort of quick experiment – I like the diagonal French tip instead of straight across, but you can always see the white part of the nail sticking out.  But I don’t like to have  a solid background color either … So I wanted to see if adding a stark color like black would distract enough from the lighter part of my nail sticking out like a sore thumb.  I don’t really think it did, but it’s not a bad manicure, anyway I guess. ^^;;

IMG_20121125_222841
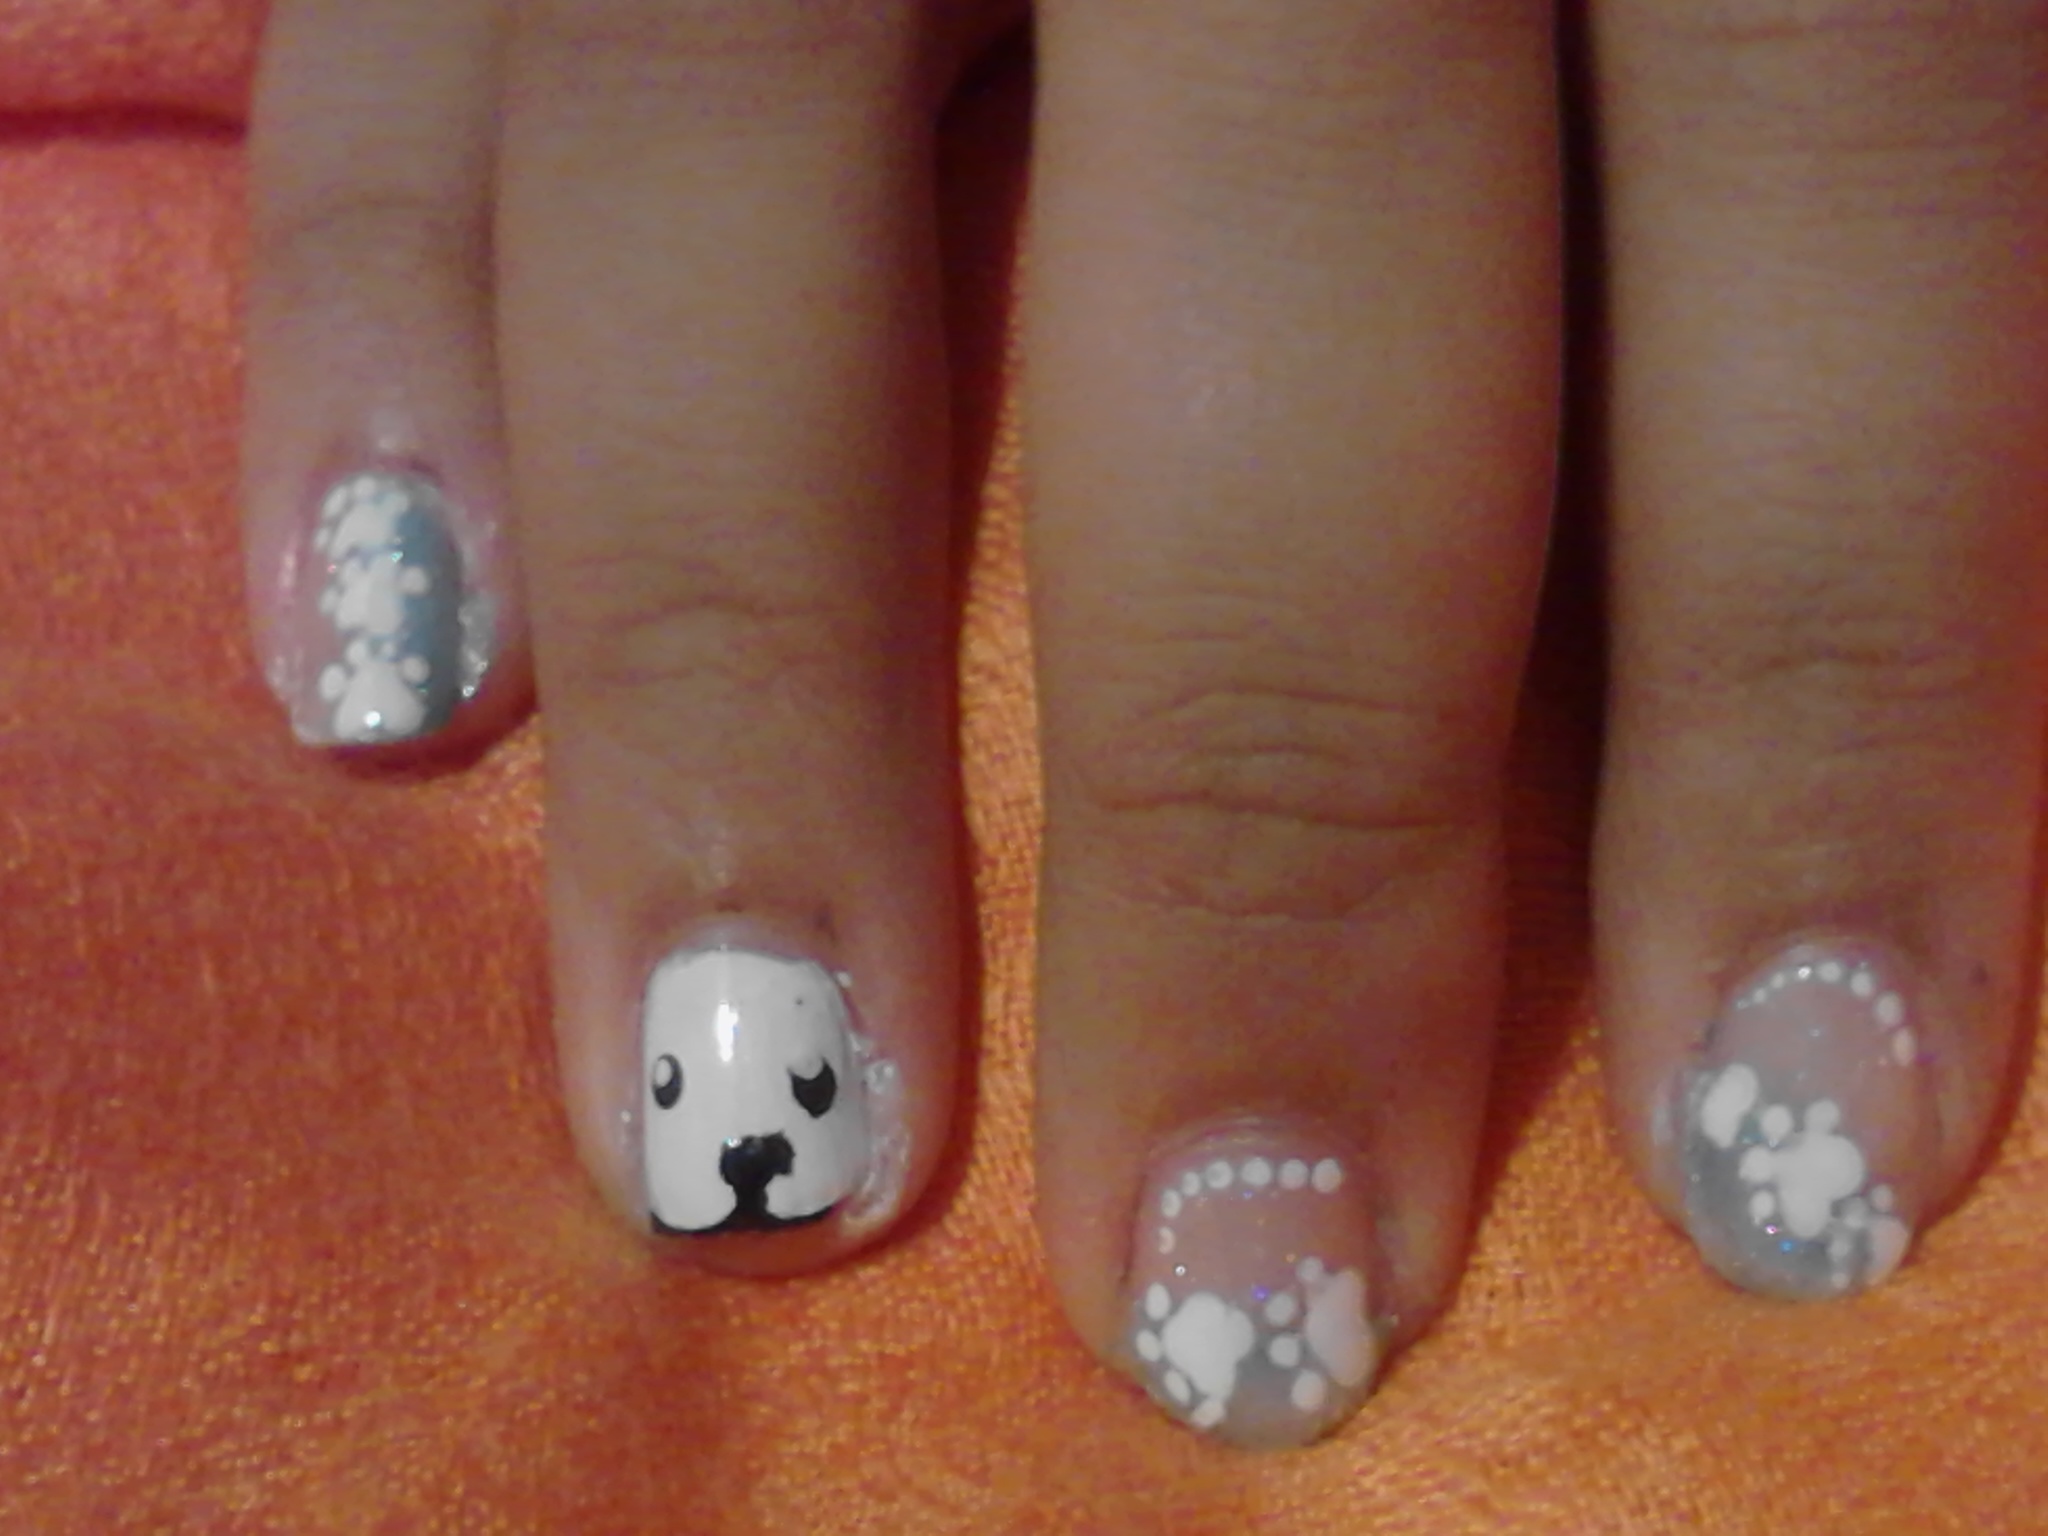
Only a couple more, I promise! xD This one should look familiar – this is a design by CutePolish on YouTube for Movember; I wore this for the entire month in 2012 (told you some of these were old) and this was one of the weeks.  I think mine’s not as cute as hers, probably because the ends don’t taper as nicely and the bottoms aren’t as well rounded as they could be, but I think this was the first or second attempt, so I hadn’t really gotten the whole shape down yet … Also look at that pinky nail!  Sometimes, since my pinky and ring fingers grown the longest, it looks like I have a drug nail or something until I break down and cut it before it gets too long … Or else nature does the job for me and it breaks off and I swear for a few weeks before it grows back out again.  ^^;;

1202130741But anyway yeah; mustache nails – I really am not sure what else to say, except that actually, looking at them now, these nails look a little boring … They need a little something – but then again, I like bright colors and craziness and lots of stuff going on … Not that you couldn’t tell that from the other nail art I’ve posted.

Anyway; almost done – two left.  This one was just a concoction that I came up with when I was moving.  Once again, all I could find was my For Audrey and black striper, but I also had a dark taupe-ish brown color from NYC that probably doesn’t have a name, it’s probably a number ^^;; But either way, I kind of just threw these things together and came up with this … Once again, look how long that pinky  nail is xD  This is a bad habit I really need to get out of …

0720131142And last but not least, this one should look familiar; it’s my Chocobo pedicure!  No one really seemed to care about this at the end of the Moogle manicure I posted on YouTube … But I still thought it was cute so I’m including it here.

Leave me a comment if you want to see a tutorial of any of these, and until my next post …

May your life be full of color!

❤ RaeynnBeau

Orange is the New Black!!???

Picture310So, guess what I just found out when I was looking for fall fashion trends to write about for work?  Apparently the fashion gods decided that this fall, much like the television program, Orange is the New Black … you have no idea how excited I am, because I am going to rock the shit out of this trend xD

Orange is definitely my favorite color, mostly because it’s loud and I think it looks good with my complexion, and I love to wear it even when it isn’t trendy.  Which sometimes gets me looks, but if done tastefully, orange can really be an awesome pop of color in an otherwise drab or dreary outfit.  I recognize that some people can’t wear orange; unfortunately, not a lot of people recognize that they can’t wear orange when they want to … So I’m writing to sort of give some ideas for ways to wear the color without totally overpowering the outfit if you aren’t really able to wear it, and even if you are, because looking like a citrus fruit walking down the sidewalk isn’t cute either. xD

Orange Lips First, we’ll start off by carrying over a trend from earlier in the year – orange lips.  Orange lipstick became super popular in the beginning of summer, and everyone who is anyone is making guides on how to wear the lip.  (So I must not be anybody because I didn’t make a video on this xD)  It’s a really good way to say “BY THE WAY LOOK AT MY LIPS” if you want to draw attention there.  However, use with caution; this lip really needs to be worn with a very subtle make up look on the rest of your face, because otherwise it will look unbalanced.  It can definitely be loud, depending on if you go with something particularly crazy like Morange from MAC, but it can also be a really fun statement if you wear it right.  Look around on YouTube if you want to know how; there are millions of videos.  Or, if you want, leave me a comment and I can jump on the bandwagon and film something.  (I’m never above requests, no matter how already done they are).

Osaka-To-MeOrange-500x500Next we have orange nail polish (pictured is Osaka to Me Orange is OPI, which is my favorite orange polish) in case you don’t know if you can pull off all of that orange on your face.  Nails are a great accessory that a lot of people don’t think of, and it only takes at most ten minutes to throw on two coats of color and a clear coat, (and that’s if you are watching TV or something while you’re doing it) and if you use a fast drying top coat, you’ll be set in a few minutes.  Quick nail art can always spruce them up a little more nicely as well – if you just take a sponge and some dark brown polish, you can make a quick ombre gradient down your nail, depending on how long they are, and a little blit of glitter can draw attention with some glitz and glam.  It looks like you took a long time planning, when really you were just watching your favorite TV show the night before!

url Now we have Taylor Swift as a model for the next idea for a pop of orange; a scarf.  Especially with the months getting colder, a scarf is the perfect accessory to add a little orange into your ensemble.  Paired with a solid tone neutral coat or jacket, and it really draws the eye.  However beware, if you don’t have a good complexion for orange, rather than wearing a solid  colored scarf like Taylor is, try and find a patterned scarf that has orange accents in it.  That way you won’t have all of that orange right up against your face if it happens to clash with your skin tone, but you’re still incorporating some interest with the pops of bright color against then neutral tone of your coat.

Orange ShoesIf you really want to keep the orange away from your face, then orange shoes might be what you should look for.  A flash of color with a drab outfit, if you are wearing the majority of a neutral color, like black, white, brown, or tan, especially in an office setting, then a killer pair of shoes is a good way to introduce the flare of fashion into your life.  Actually, the most popular thing for this season are calf high boots like cowboy boots, so if you can find an orange pair of those, more power to you!  I think it might be a little much, but no one can say it isn’t fashionable for this fall season, that’s for sure. xD  Otherwise, simple strappy sandals can be enough to add a hint of orange while not overpowering then lower half as well, or a peak of orange from some sneakers underneath your jeans.

orange-clutchNext on the list of accessories is an orange purse, which can either be solid like this picture example, or it can be patterned with splashes of orange as well.  And, if you are using a clutch like this or a handbag, you can decide how close to your face it gets.  Hold it at your hip if you aren’t sure whether or not orange is all that flattering to you, or keep it up near your face like in this image if you are sure your complexion screams “MOAR ORANGE PLZ”. xD  A bright piece like this could be paired with a dark dress or pants suit for the office, or as in the picture, a bright contrasting color like a deep blue for an even more dramatic color combination.

5639d936bd6ec1c3_3fd1e38203b13493_DSC_0676-1.previewFinally, we have my favorite fashion trend of the year, paired with this new orange hype – the over sized coat.  I could write a whole post just on how to wear the coat, but this is definitely one of the most versatile options for wearing orange if you can pull off the color in large doses.  Since I love wearing orange, I think I can (or at least, I hope I can!) and would love a big warm sweater like coat like this to keep me warm on the particularly blustery days in the Big Apple.  If you really want to wear it but orange isn’t exactly the right color for you, make sure you leave it undone and wear a contrasting color to offset it, like the black outfit in the picture.  Or, if you need to do it up because Baby it’s Cold Outside, then you might want to consider wearing a contrasting color scarf and belting it with a contrasting color, like a thick black belt, to break up the block of orange.

As you can see, I’m pretty excited about this development, and I can’t wait to see more orange clothes in stores in the months to come.  It’s an excellent color right alongside black imo, so the only thing that I’m personally surprised about is the fact that it’s taken this long for orange to become a fashion trend like black!

Until next time,

❤ RaeynnBeau

Interesting Crackle Nail Polish Discovery

Alright, so I have a slightly abusive relationship with. Crackle nail polish.  Until very recently, I could never get them to work, like EVER, no matter what I do to try and change it.  And suddenly, they magically started working for me; I was super excited.  This was the first picture I tweeted when I got them up and running, actually:

image

They are two of the crackles from the Nicki Minaj line by OPI if I remember correctly on top of Orly Platinum.  But yeah, so anyway, I really love crackle polishes now that they’ve decided to work for me and do what they are supposed to do.  However, as I found out today, that is not always the case.  These polishes do not act right sometimes …

Let me explain my thought process before I tell you what I did, because it’s sort of a doozy. ^^;;  I just moved to NYC and started a new job, and this was a very sudden change for me.  Like, so sudden that I had an interview Thursday and started the next Monday, so I had to pack and move several hundred miles in three days or so.  Yeah, hectic.

Needless to say, during those three days I didn’t have much time for beauty endeavors, and because of all the packing and moving boxes, my nails suffered horribly.  Only one outright broke thankfully, but the polish was in a sad state when I was done.  What was once a neat manicure with OPI’s Pink Friday (another from the Nicki Minaj collection I realize ironically) was chipped and horrible, and I didn’t have time for a manicure.

So, I decided that the best thing to do would be to put crackle polish over the top of it instead of taking the time to remove the polish and put on a whole new color.  I figured when the polish cracked it would disguise the chipped polish underneath, and might even give a two toned mosaic effect too.  Well, I put on a quick coat of polish, and something very interesting happened.  Let’s see if you can spot it in this picture.

image

Can you tell? … Look REALLY carefully and you’ll see what I mean when I explain.  The best example of what happened is actually my thumb, so I’ll give you a close up.

image

Excuse the mess, but you can see how the part near my cuticle cracked nicely, while up near the free edge it isn’t cracked at all?  Well, where it is nicely cracked is where there is pink nail polish underneath the blue crackle, and where this is no crack is where the Pink Friday chipped off.  You can also see it a bit on my middle finger above as well, and there are almost no cracks on my pointer finger, which was the one missing the most pink polish.

Obviously my idea was a failure, and I’ll have to get this polish off tonight and sorted out – but I found it very interesting that the polish didn’t react to my bare nail like it did to the pink nail polish.  Not sure if the same thing would happen if you put plain clear polish first, but maybe this was part of my problem before?  Putting crackle polish on without a base of some kind that the crackle polish would react to …?

Dunno, but I figured it was an interesting tidbit to let you guys know I discovered ^^;;

Let me know if you have any good tips or tricks about that tricky crackle polish, and let me know what you want to read on here :3

Until next time!

Moar Nail Art

So, I try to give myself a new manicure twice a week – once sometime around Sunday (so, Saturday, Sunday, or Monday) and once sometime around Wednesday (so, Tuesday, Wednesday, or Thursday) and I live nail art. I hate leaving my nails a solid color our just a pain French – it feels like cheating … So I always try to do something, and if I really like how it comes out, I take pictures (as you’ve probably seen from my earlier post) .. And more I have more! ^^;;

image

This was from a couple weeks ago, playing with fimo fruit slices and different color splotches … I think it’s a strawberry, honey dew slice, lemon, orange, and dragonfruit.

image

This was a pedicure from the same day – I was trying to find a good French pink for my nails, but this one was too beige I discovered. the big toes are the only thing frenched because the little ones would be too difficult – and I got the metallic stars from Sally’s. :]

image

This is a swirly green and silver design … That’s really all I can call it. xD I asked a friend how I should paint my nails, and she said, “oh do something green! And silver – and swirly!” …. This was what I came up with xD

image

This was the first time I EVER got my crackle nail polishes to work – it’s a lace design with rhinestones. You have no idea how excited I was when the black cracked! :3

image

Since I had such luck with the black, and I own 3, I figured I’d try the other 2 as well – I’m not sure it really counts as nail art, but I was really excited it worked! xD

image

This is the one I just did yesterday – it’s a silver and navy Rufian manicure with some silver chunky roses I just did with the regular nail polish brush.  Here’s a close up of one of the roses so you can see a little better:

image

I’ve never tried a Rufian manicure before – it was difficult getting the navy line even with my cuticles …

Anyway, that’s all for now – just a quick mobile update because I realized I had all these pictures on my phone xD

Til next time,
RaeynnBeau

Nails, Nails, Nails

Alright guys and gals – new blog!  And this one is about health and beauty … Or in this case, manicures!  I have been really into the manicure scene, on and off for the past few years, mostly because of my frustration at the length of my nails (or lack thereof).  It’s a full-time gig taking care of these silly things and getting them to grow, and pampering them while still leading a normal life, complete with an occupation …

But anyway; I took some pictures of my manicures for the past week – I do my nails twice a week, once on Sunday and once on Wednesday.  Well, last Wednesday, I did a Mosaic French (first), Sunday I did the nails Effie Trinket wore during the reaping in the Hunger Games Movie (center) and today I’m rocking some Braids (last).

Green Mosaic French

Effie Trinket’s Reaping Nails

Braids

Not too content with how the braids came out, but I did them really quickly just before I went to bed because it was already around 2am and I had to get up in 4 hours to sleep, so they’re pretty sloppy, and the neon didn’t cover the dark peacock green very well … I don’t really like the french tips either – I like the idea, and I’m sure they’d look better if I had made them neater … Oh well.  I’ll just take them off immediately upon my waking on Sunday morning and mani it up all over again … Probs going to add some fimo slices or something fun :3

Manicures were taken from the following YouTubers:

Mosaic French: TartoFraises1

Effie Trinket/Braids: CutePolish

So … Yeah.  I’ll probably be back with a pedi on Saturday, and maybe some polish reviews next – I have a pretty scathing one for a certain gel topcoat I used back in January or so that I could put here, and one about an awesome nail whitener from the UK … We’ll see.

‘Till we meet again!

-RaeynnBeau